
These red velvet cupcakes with whipped cream cheese frosting are moist, fluffy, and so easy to make! For the best color and flavor in your cupcakes, use powdered red food coloring in the batter.

Jump to:
Red velvet is a fake flavor. It's a gimmick that people fall for because red is a pretty color. It's just chocolate cake, but with like, 5% of the chocolate, plus buttermilk, food coloring, and vinegar. However, everyone is apparently nuts for red velvet and I'm a people pleaser. So here's my take on red velvet cake- I still think it's a fake flavor, but these cupcakes are pretty good regardless.
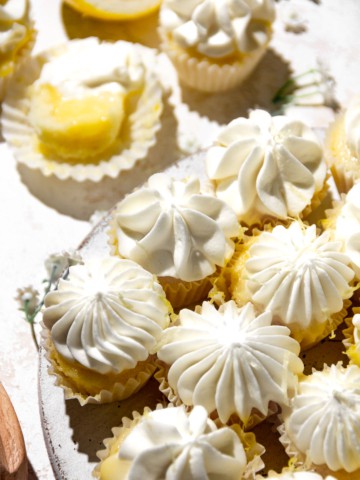
A big reason why these cupcakes are so good is the frosting! This recipe uses a whipped cream based cream cheese frosting. Basically, you whip cream cheese with some sugar, vanilla, and lemon juice, then beat in some heavy cream. This method produces a frosting that is light, fluffy, and not too sweet, as opposed to traditional butter and powdered sugar based cream cheese frostings.
If you're with me that red velvet is a scam, be sure to try my chocolate raspberry cupcakes, best vanilla cupcakes, chocolate peanut butter cupcakes, and mini vanilla cupcakes!
Ingredients
For the Cupcake Batter:
- Sugar: Don't reduce the amount- sugar not only adds sweetness, but moisture too!
- Flour: All-purpose flour is best here- no need for cake flour.
- Cocoa powder: Natural or dutch-processed cocoa powder both work for this recipe.
- Baking soda: Helps the cupcakes rise.
- Buttermilk: Provides that signature tangy flavor in all red velvet desserts. While in my vanilla and chocolate cupcakes you can substitute sour cream or Greek yogurt, I recommend against that here, since buttermilk is used not only for moisture but moreso for flavor.
- Oil: Only oil is used in the batter- no butter. This makes the cupcakes extra soft and moist, even when refrigerated. Since buttermilk, cocoa powder, vinegar, and coffee flavor the batter, you won't notice a taste different without butter.
- Egg:
- Vinegar: Apple cider vinegar or white distilled vinegar both work here. The vinegar provides extra acidity that helps provide that distinct "red velvet" flavor. It also helps activate the baking soda so the cupcakes rise.
- Coffee: Don't worry, these cupcakes don't taste like coffee! I found that adding a bit of coffee boosts the chocolate flavor without being overpowering. These cupcakes were missing something without it!
- Vanilla & salt: For flavor.
- Red food coloring: I highly recommend using POWDERED red food coloring, not liquid or gel! More on that below.

For the Cream Cheese Frosting:
- Cream cheese: Make sure to use blocks of cream cheese, not cream cheese spread (save that for bagels!).
- Powdered sugar: Sift the powdered sugar before using for an extra smooth frosting.
- Lemon juice: A small splash of lemon juice brightens the flavor without tasting lemon-y. Don't leave it out!
- Vanilla: For flavor.
- Heavy cream: This frosting is a stabilized whipped cream, so obviously you'll need some cream!
Step By Step Instructions
Before beginning, preheat your oven to 350°F (177°C) and line a muffin pan with 12 paper liners.
STEP 1: Mix the dry ingredients. Whisk the sugar, flour, cocoa powder, baking soda, and salt in a medium bowl.
STEP 2: Dye the buttermilk. Add the red food coloring to the buttermilk and whisk until you get your desired shade of red. Doing this before adding other ingredients prevents you from overmixing the batter if you end up having to add more food coloring multiple times.
STEP 3: Mix the wet ingredients. Whisk the dyed buttermilk, oil, egg, vanilla, and vinegar in a large bowl.


STEP 4: Combine the dry and wet ingredients and add coffee. Add the dry ingredients to the wet ingredients and pour in the coffee while it is hot. Whisk together until combined. The batter will be slightly thin.
STEP 5: Scoop the batter into liners. Divide the batter between 12 paper liners. I find using a large cookie scoop is the easiest, least messy way to do this!
STEP 6: Bake. Bake for 16-21 minutes, or until a toothpick comes out clean or with a few moist (not wet) crumbs. Set the pan over a wire rack to cool. After 15 minutes, remove the cupcakes from the pan and allow them to cool completely before frosting.
STEP 7: Make the frosting. In the bowl of a stand mixer, whip cream cheese and sugar for 3-5 minutes or until light and fluffy. Add lemon juice and vanilla.
Then, reduce the mixing speed to low and slowly pour in the heavy cream. Once all of the cream has been incorporated, increase the speed to high and beat until stiff. Remember to scrape the bottom of the bowl so that the cream cheese mixture gets fully incorporated with the cream.
STEP 8: Decorate. Pipe the frosting onto the cupcakes using an 18-inch piping bag and Wilton 1M tip, or simply spread it on with a knife. Top with red velvet cake crumbs or sprinkles as desired.
STEP 9: Serve. Serve the cupcakes immediately, or store in an airtight container in the fridge for up to 2-3 days!
FAQ
Red velvet desserts do contain chocolate (usually in the form of cocoa powder), but typically in a very small amount compared to that in chocolate cake. Additionally, buttermilk and vinegar are used to give a uniquely tangy flavor.
In this recipe, vinegar is used to provide extra acidity to react with the baking soda, helping the cupcakes rise.
However, historically, red velvet cakes and cupcakes were colored using beets as opposed to modern food coloring. If the batter was too alkaline, the beets would turn a bluish hue when baked. Adding vinegar would lower the pH, resulting in a more red color!
You can leave out the food coloring and the cupcakes will objectively have the same taste and texture.
However, having a bright red color affects your perception of the flavor. Since "red velvet" is a more subtle, hard-to-pin-point flavor, when red velvet desserts aren't actually red they aren't perceived as being red velvet flavored in the same way. More on the science behind how color impacts taste perception here!

What Type of Food Coloring Should I Use?
Liquid, gel, and powdered food coloring are the 3 types most commonly used.
- Liquid food coloring is not very concentrated, so you need to add a lot for the color to come through. However, adding such a large amount can impart a bitter taste.
- Gel food coloring is more concentrated than liquid, so a small amount will give a brighter color. Despite this, I still often find that it adds a bitter, almost salty flavor.
- Powdered food coloring provides a strong, bright color without adding any flavor. I highly recommend using powdered food coloring over liquid and gel for this reason. My favorite brand is Americolor!
Expert Baking Tips
- Use hot coffee: Not cold, not room temperature, not warm. HOT coffee blooms the cocoa powder, resulting in a more deep and strong chocolate flavor in the cupcakes.
- Don't overbake: Start checking your cupcakes after 16 minutes. It can take just a minute or two for the toothpick to go from completely wet to just a few moist crumbs (which is what you want- a clean toothpick means overbaked and dry!). Keep a close eye on the cupcakes at the end of baking.
Storage and Freezing Instructions
Store leftover cupcakes in an airtight container in the fridge for up to 2-3 days or in the freezer for up to 2-3 months. Thaw frozen cupcakes in the fridge overnight before serving.
More Cake & Cupcake Recipes You'll Love...


Leave a STAR REVIEW below if you try this recipe! Tag me on Instagram @treatsbytalija and for more ideas, check out the other desserts on my blog!
PrintRed Velvet Cupcakes with Whipped Cream Cheese Frosting

These red velvet cupcakes with whipped cream cheese frosting are moist, fluffy, and easy to make! My #1 tip is to use powdered food coloring.
- Prep Time: 20 minutes
- Cook Time: 20 minutes
- Total Time: 90 minutes
- Yield: 12 cupcakes 1x
- Category: cakes & cupcakes
- Method: baking
- Cuisine: American
Ingredients
For the Red Velvet Cupcakes:
- 200 g granulated sugar
- 150 g all-purpose flour
- 10 g natural or dutch-processed cocoa powder
- 1 tsp baking powder
- ½ tsp baking soda
- ¼ tsp salt
- 180 g buttermilk, at room temperature
- Red food coloring, preferably powdered food coloring
- 60 g vegetable or canola oil
- 1 large egg, at room temperature
- 1 tsp vanilla extract
- ½ tsp white distilled or apple cider vinegar
- 60 g coffee, hot
For the Cream Cheese Frosting:
- 8 oz (226 g) cream cheese, straight from the fridge
- 75 g powdered sugar, sifted
- 1 tsp lemon juice
- 1 tsp vanilla extract
- 250 g heavy whipping cream, straight from the fridge
Instructions
Make the Cupcakes:
- Preheat oven to 350°F (177°C). Line a muffin pan with 12 paper liners. Set aside.
- In a medium bowl, whisk the sugar, flour, cocoa powder, baking soda, and salt until combined. Set aside.
- Pour the buttermilk into a large bowl. Add food coloring and whisk until you achieve your desired intensity and shade of red. The amount you add will depend on which type you use and how red you want your cupcakes to be. Start with a small amount and add more as needed. For gel food coloring, start with a small dollop. For liquid food coloring, start with 1-2 teaspoons. For powdered food coloring, start with ¼-1/2 teaspoon.
- To the buttermilk and food coloring mixture, add the oil, egg, vanilla, and apple cider vinegar. Whisk until combined.
- Add the dry ingredients to the wet ingredients and pour in the hot coffee. Whisk until a thin, smooth batter forms.
- Divide the batter between the 12 liners, filling ⅔-3/4 of the way to the top. A large cookie scoop makes this easy.
- Bake for 16-20 minutes, or until a toothpick comes out clean or with a few moist (but not wet) crumbs. Set the pan over a wire rack and cool for about 5 minutes, then remove the cupcakes from the pan and allow them to cool completely to room temperature.
Make the Frosting & Decorate:
- Add the cream cheese and powdered sugar to the bowl of a stand mixer. Using the whisk attachment, whip on high speed for 3-5 minutes or until the mixture is smooth. Add the lemon juice and vanilla and whip for 1 more minute.
- Reduce the mixer speed to medium-low. Slowly pour in the heavy cream to the cream cheese mixture as it whips. Once most of the cream has been incorporated, increase the speed to high and whip until the mixture is stiff. Don't over whip or it will curdle. Make sure to scrape down the bottom of the bowl as needed to fully incorporate the cream cheese mixture with the heavy cream.
- Decorate the cupcakes with frosting as desired. I piped tall swirls on the pictured cupcakes using 18-inch disposable piping bags and a Wilton 1M tip. You can also simply swirl the frosting on with a knife.
- Top the cupcakes with sprinkles or red velvet cake crumbs as desired to decorate.
Notes
- Quickly bring ingredients to room temp: Microwave buttermilk in 5-10 second increments. Place egg in a bowl with warm water for 10 minutes.
- In a pinch, you can substitute the buttermilk with sour cream or plain Greek yogurt, but I highly recommend using buttermilk for the ideal "red velvet" flavor.
- I recommend using powdered food coloring over gel or liquid. More info about that in the blog post above.
Nutrition
- Serving Size: 1 cupcake
- Calories: 335
- Sugar: 25 g
- Sodium: 189.1 mg
- Fat: 20.2 g
- Carbohydrates: 35.8 g
- Protein: 4.2 g
- Cholesterol: 59.8 mg
Keywords: red velvet cupcakes, red velvet cupcakes with cream cheese frosting, whipped cream cheese frosting, moist red velvet cupcakes, easy


Leave a Reply