
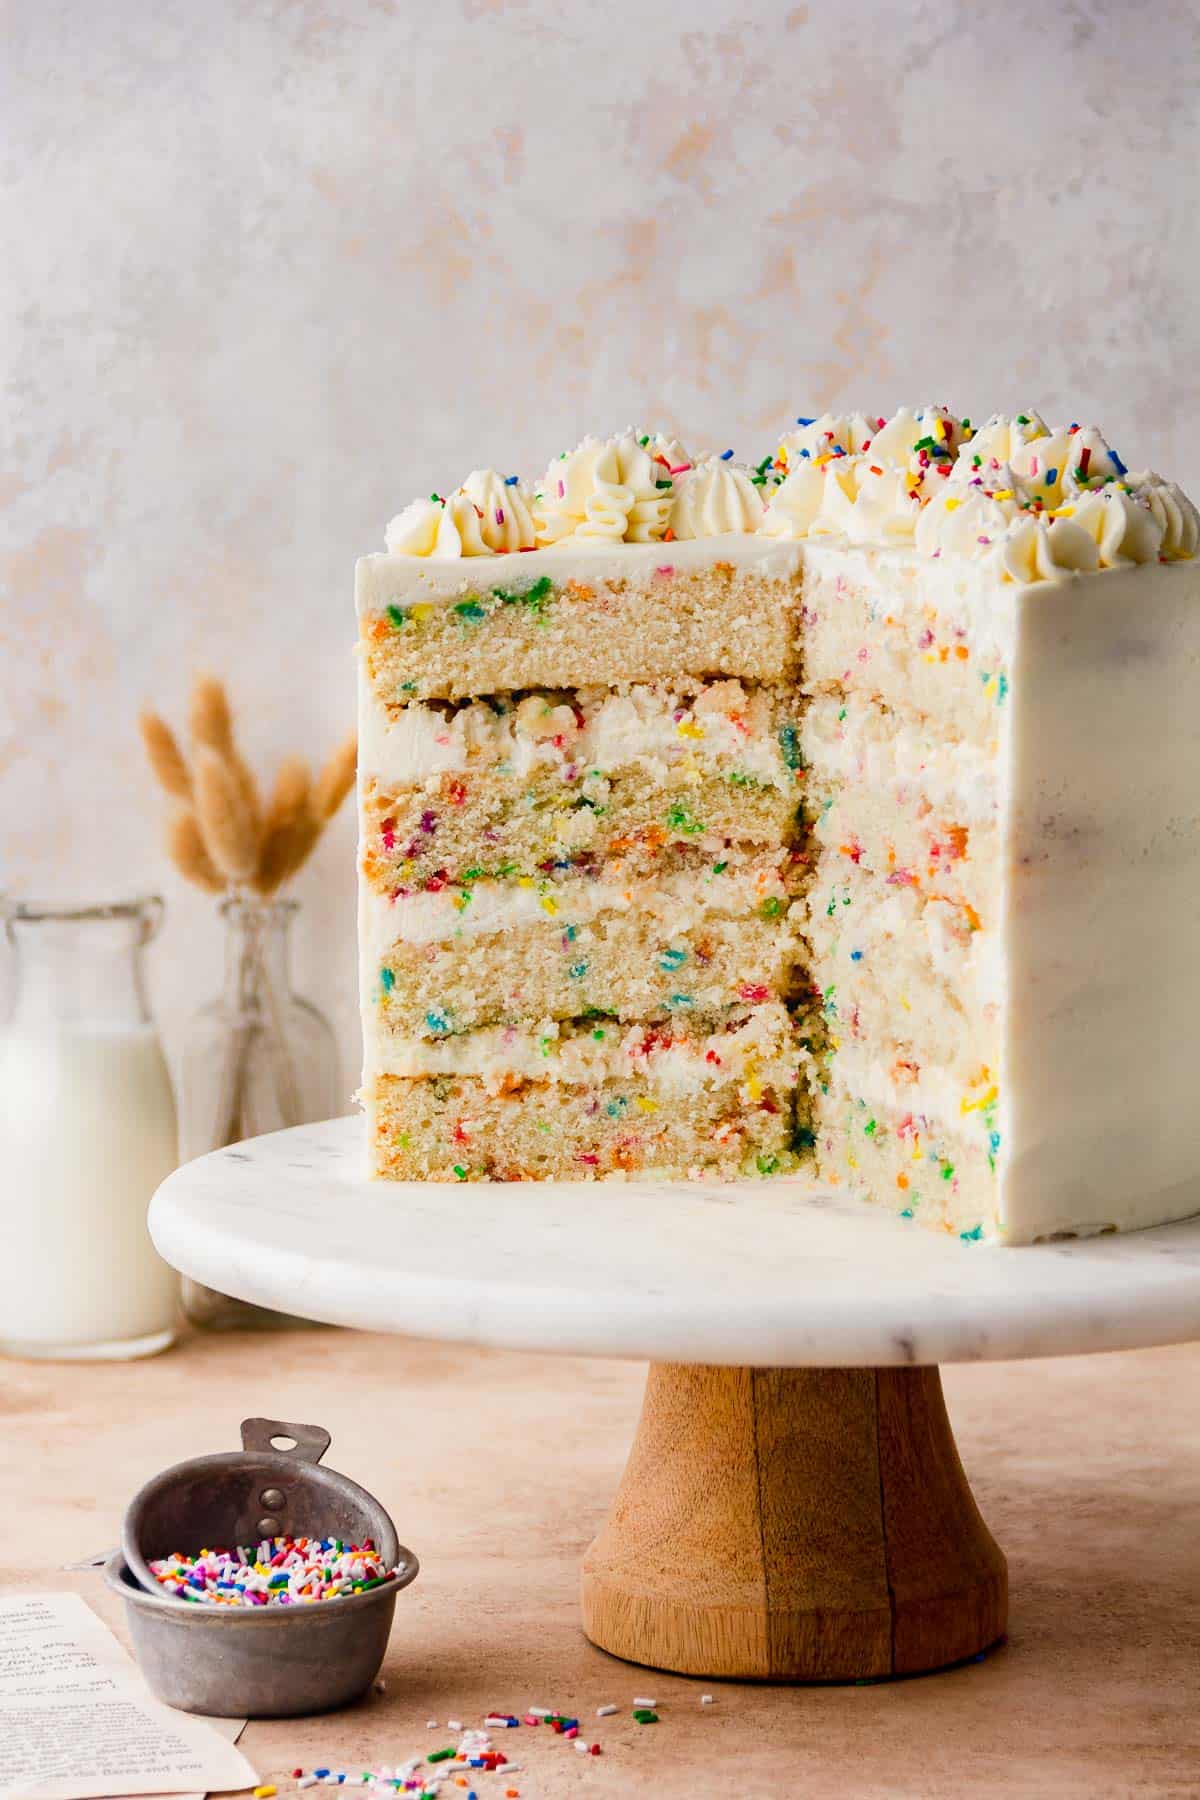
This 8-inch vanilla birthday cake combines 4 moist funfetti cake layers with a Milk Bar-style crunch filling and a creamy whipped frosting. A less sweet frosting and texture from the crunchy cake crumbs elevate classic birthday cake to the next level!

Jump to:
Why This Recipes Works
- Perfect vanilla cake: My vanilla cake batter is perfectly moist, soft, and fluffy. Because it's such a versatile recipe, I use the same batter, scaled up or down, to make so many other recipes, like my best vanilla cupcakes.
- Whipped cream frosting: Stabilized whipped cream is stiff enough to hold up the cake layers, but doesn't make it taste overly sweet like American buttercream can.
- Crunchy filling: Christina Tosi's famous Milk Bar cakes all use a crunchy crumb filling in between the layers, and it is so delicious! The crumbs add amazing texture and are so easy to make. They're just like the streusel you enjoy on coffee cake or muffins.
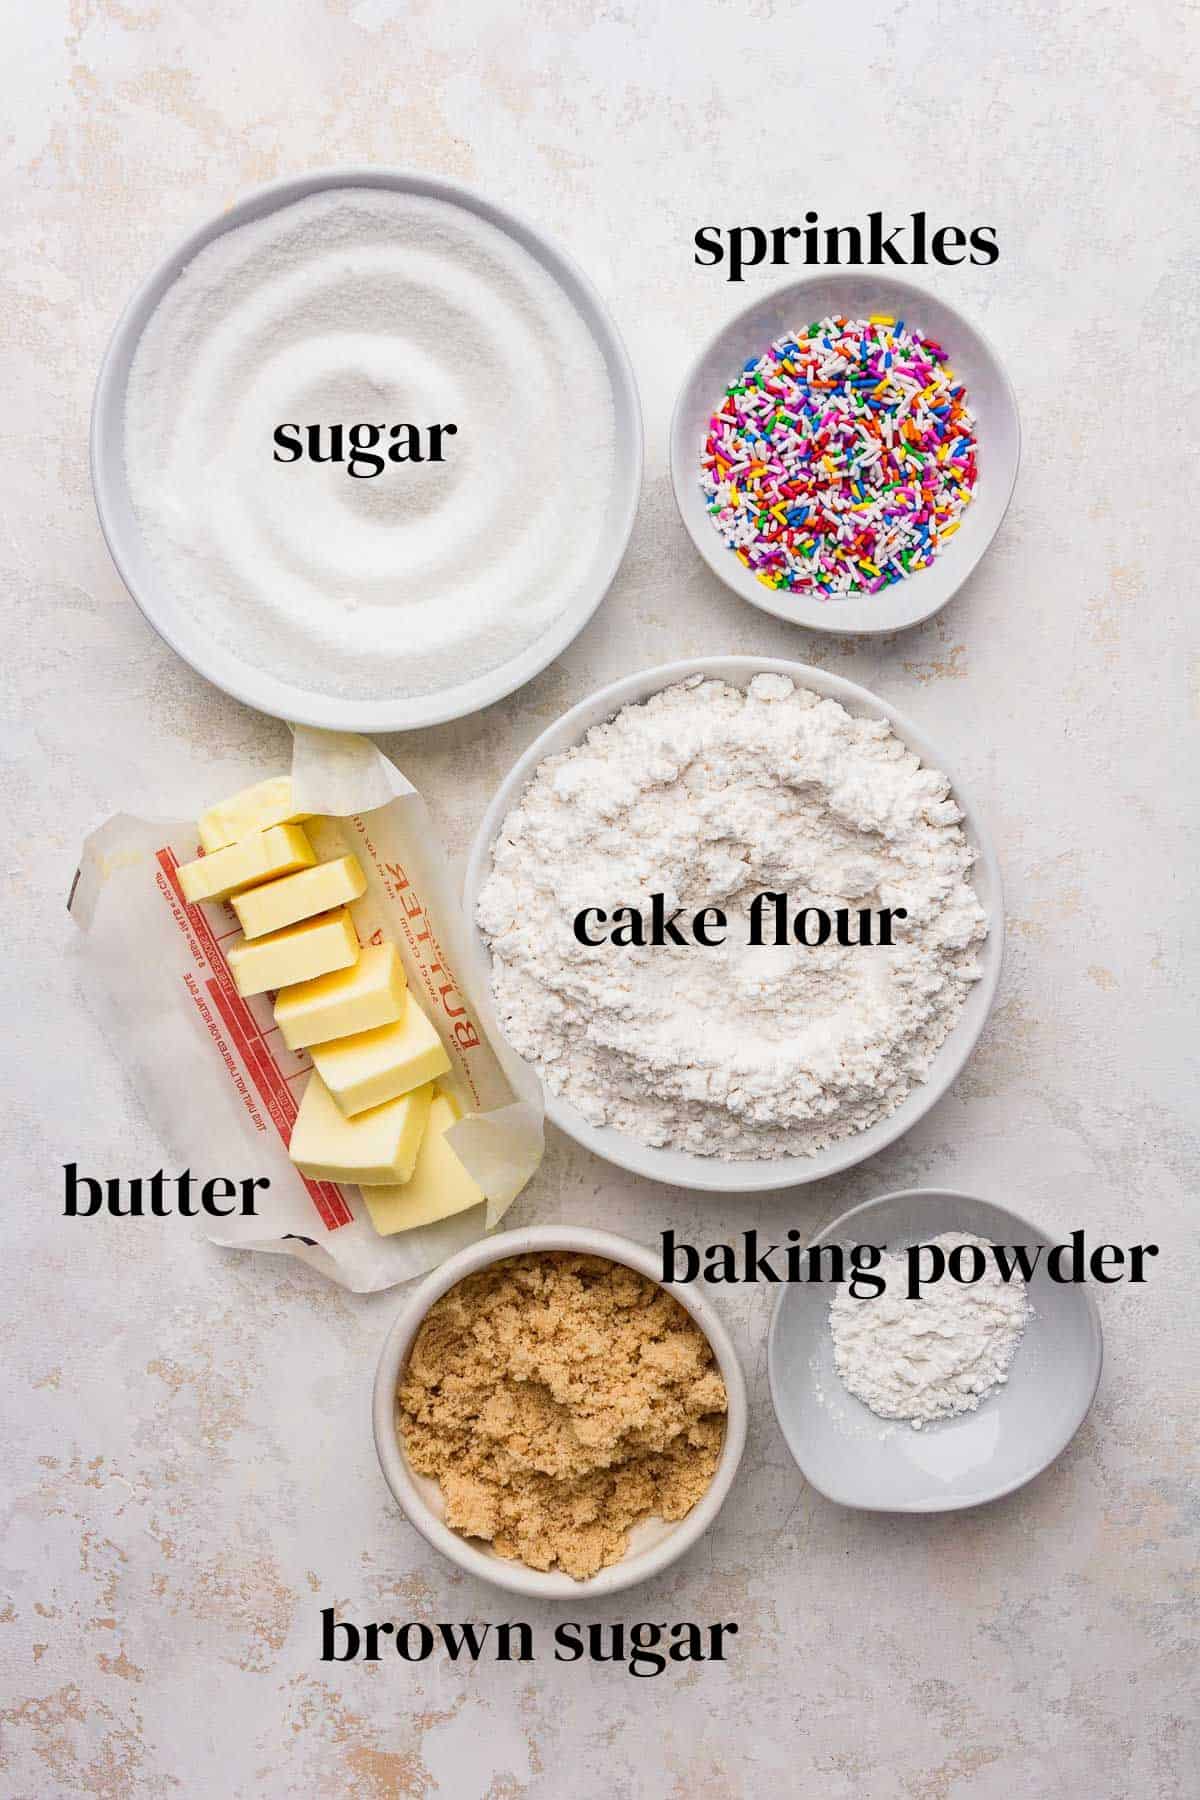
Ingredients
For the Cake Layers:
- Sugar: Don't reduce the amount- the sugar provides moisture and tenderness, not just sweetness!
- Cake flour: Use bleached cake flour, not unbleached cake flour, homemade cake flour substitutes, or all-purpose flour. My favorite brand is Swans Down cake flour.
- Baking powder & baking soda: Help the cake rise.
- Butter & oil: Unsalted butter and vegetable or canola oil are best here.
- Buttermilk: Full-fat sour cream or plain Greek yogurt can be substituted in a pinch.
- Eggs: You'll need 3 whole eggs plus 3 egg whites. The 3 extra egg yolks are the exact amount needed to make my favorite brown butter chocolate chip cookies or my brown butter oatmeal chocolate chip cookies, so whip up a batch of those!
- Vanilla & salt: For flavor.
- Sprinkles: I recommend using rainbow jimmies for this recipe. Nonpareils (the little balls) often bleed the batter. The pictured cake below uses confetti quins, but I find that those often sink to the bottom of the batter, so they aren't ideal.


For the Crunchy Filling:
- Cake flour: As with the cake batter, bleached cake flour is ideal here.
- Sugar & brown sugar: Provides sweetness.
- Butter: Binds the crumbs together.
- Baking powder: Prevents the crumbs from getting overly crunchy.
- Sprinkles: While rainbow jimmies are ideal for the cake batter, any type of sprinkles work here.

For the Whipped Frosting:
- Cream cheese: Stabilizes the frosting. Without it, the whipped cream would be too soft and loose to hold up a layer cake. It provides a slightly tangy flavor, but the frosting isn't overly cream cheese-y.
- Powdered sugar: Sift yours before using if it looks lumpy.
- Heavy cream: Make sure your cream is straight from the fridge. Warm or room temperature cream won't whip to a stiff consistency.
- Vanilla: For flavor.
Step By Step Instructions
Before beginning, make sure your ingredients (butter, buttermilk, and eggs) are at room temperature. Preheat your oven to 350°F (177°C) and line 3 or 4 8-inch (20 cm) round cake pans with parchment paper rounds. Then, grease with butter or nonstick spray and set aside.
Make the Cake Layers:
STEP 1: Combine the dry ingredients. Add the sugar, flour, baking powder, baking soda, and salt to the bowl of a stand mixer. Mix with the paddle attachment for about 30 seconds.
STEP 2: Beat in the butter. Add slices of butter into the dry ingredients and beat on low speed until the butter breaks down into very fine, sandy crumbs.


STEP 3: Whisk the wet ingredients. In a large bowl or liquid measuring cup with a spout, whisk together the buttermilk, oil, eggs, and vanilla until combined.
STEP 4: Pour the wet ingredients into the dry ingredients. With the mixer running on low speed, slowly pour the wet ingredients into the dry ingredients. Once enough liquid has been incorporated so that there are no more streaks of flour, increase the mixer speed to medium and keep pouring in the wet mixture. Stop and scrape the bottom and sides of the bowl every 20-30 seconds.
Once all of the liquid has been incorporated, the batter should be smooth and slightly thin. Then, fold in the sprinkles.


STEP 5: Pour batter into pans. For perfectly even cake layers, weigh the amount of batter in each pan instead of eyeballing it. There should be ~525g of batter per pan if you're using 4 pans, or 700g if you're using 3.
STEP 6: Bake. Bake for 22-29 minutes, or until a toothpick comes out clean or with a few moist crumbs. Once baked through, cool the cakes in the pans for 5 minutes before turning out onto a wire rack to release them and cool completely.
Make the Filling & Frosting:
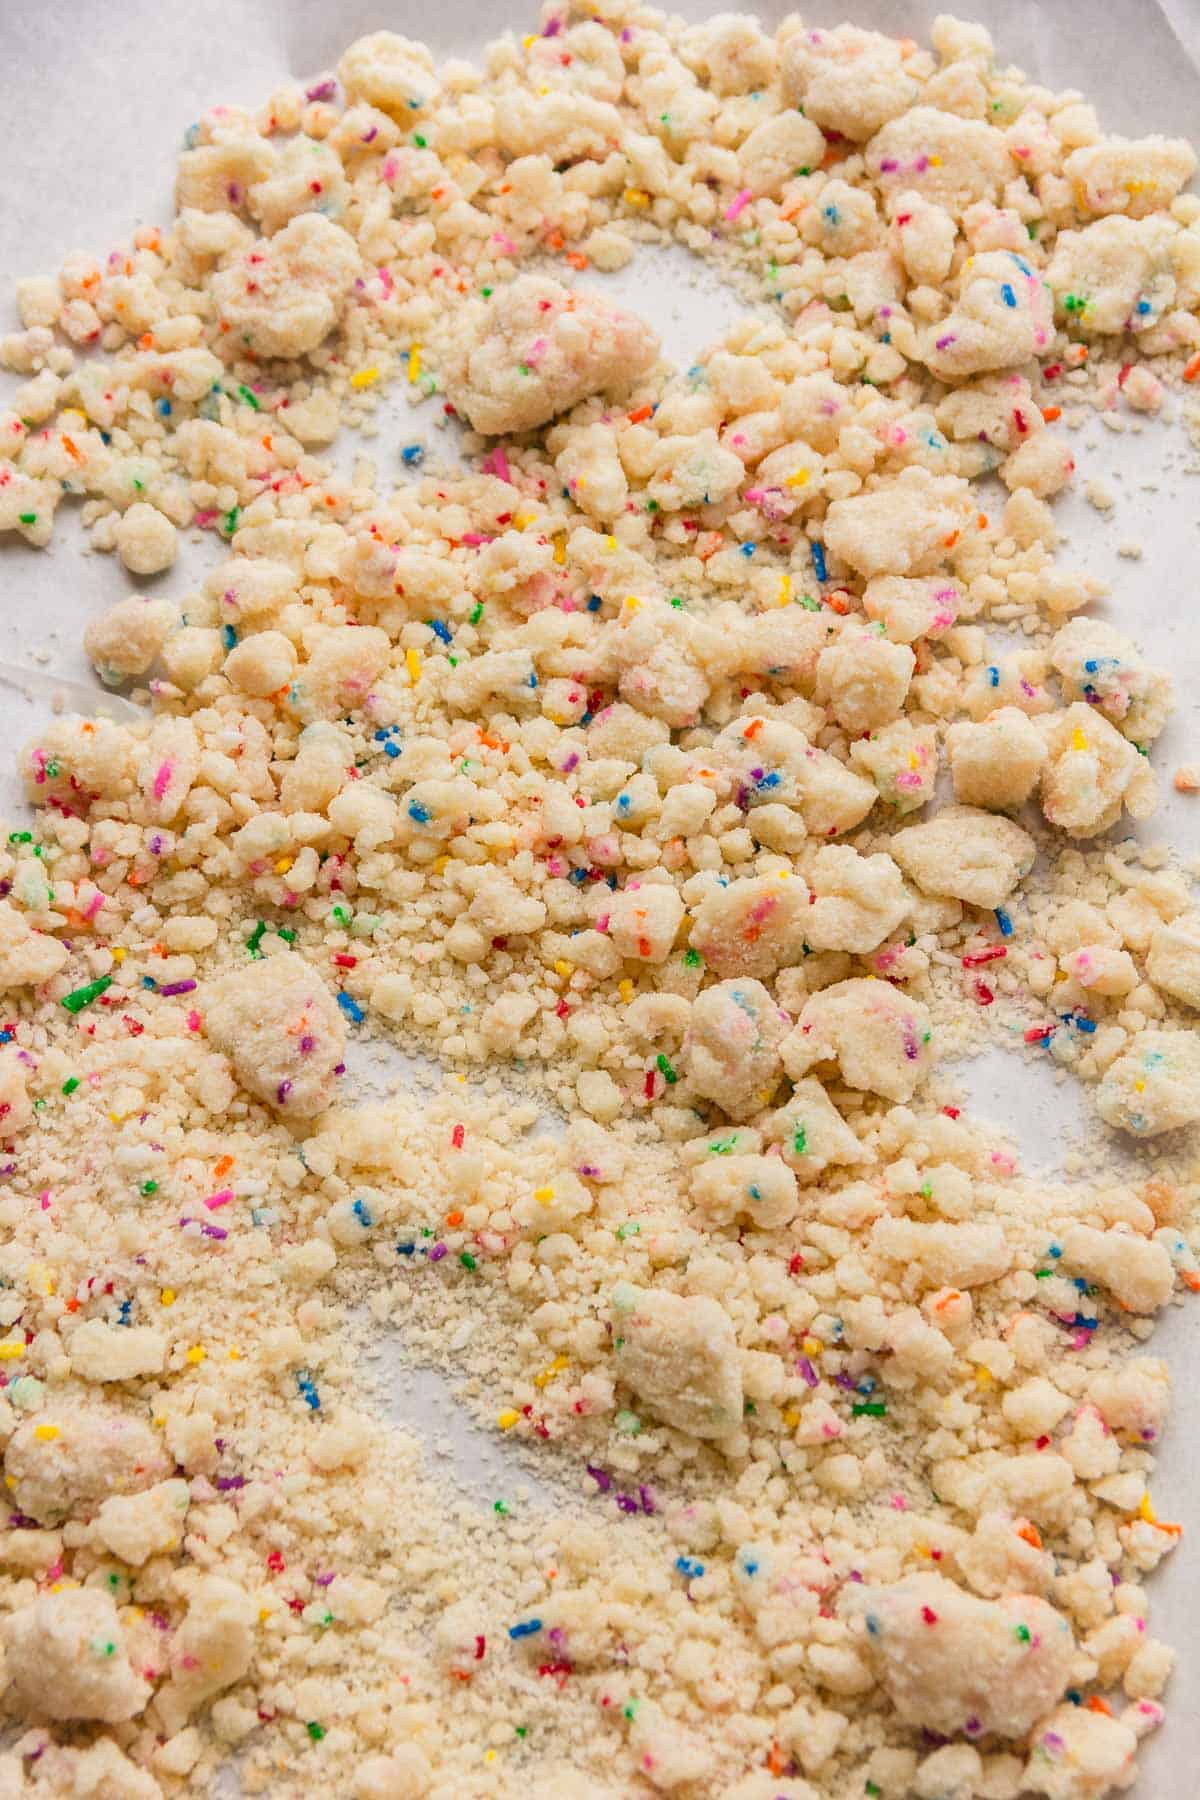
STEP 1: Make the crumbs. In a large bowl, mix cake flour, sugar, brown sugar, and baking powder. Add melted butter and mix until thick crumbs form with no more streaks of flour.


STEP 2: Bake the crumbs. Sprinkle the crumbs over a parchment-lined baking sheet and bake at 300°F (149°C) for 10-14 minutes. Every 3-4 minutes into the bake time, stir the crumbs and rotate the pan so that they bake evenly.
The crumbs are done when they are just slightly dry to the touch- they will crisp up as they cool, so don't over-bake them or they will end up rock-hard. Once the crumbs are baked and cooled, use your hands to break up any large pieces into smaller ones.

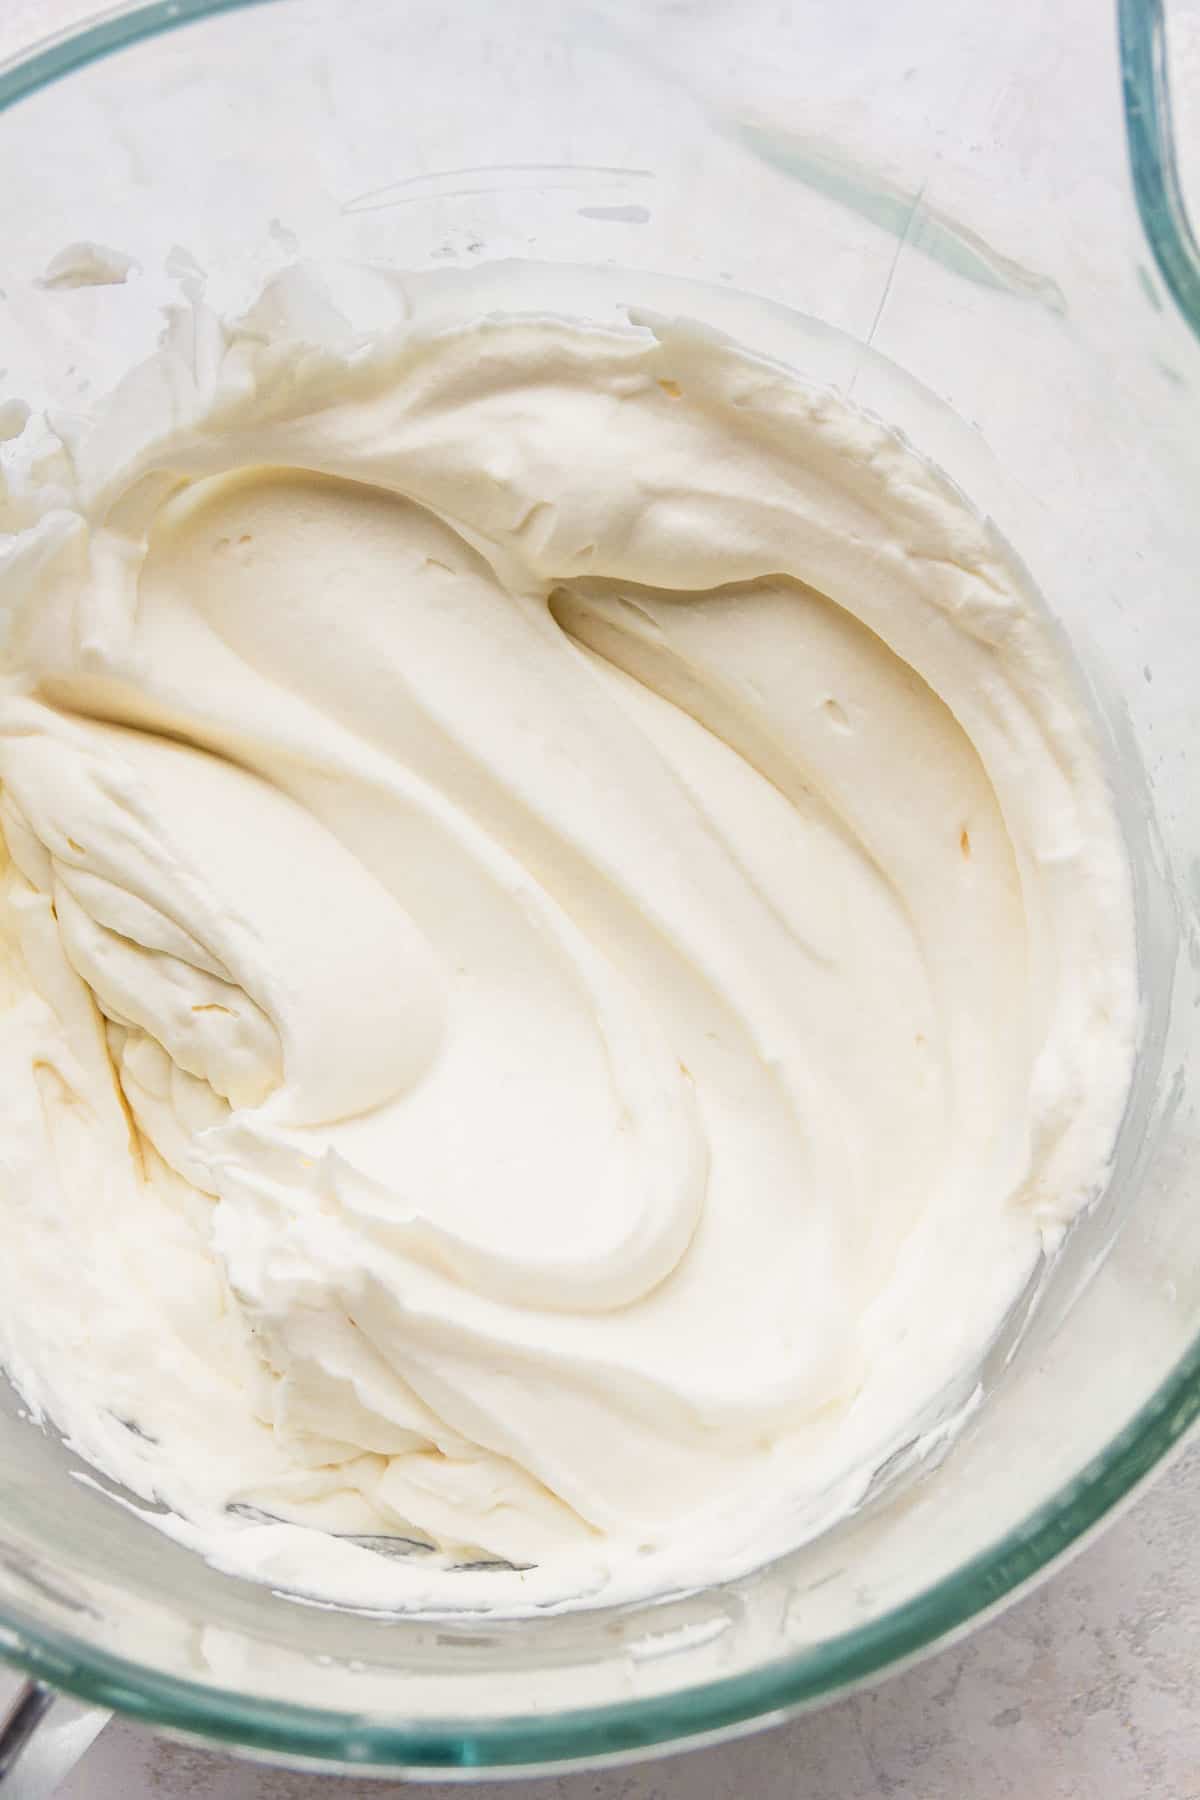
STEP 3: Make the frosting. Because this is such a large amount, I recommend making it in 2 batches so as to not overwhelm your mixer. However, you can do it all in one batch if you have a larger stand mixer (such as a 7 or 8 quart mixer).
First, beat cream cheese, powdered sugar, and vanilla for 2-3 minutes or until smooth and creamy. Then, slowly pour in the heavy cream and whip until stiff. Make sure to scrape the bottom of the bowl to ensure the cream cheese is fully incorporated with the heavy cream.

Assemble & Decorate:
Before you start decorating, I recommend setting out all of your tools to stay organized. A rotating cake turntable, small offset spatula, straight icing spatulas, and bench scraper are all recommended for frosting the cake. For piping on top, use large disposable piping bags and your favorite piping tips- I like Wilton 1M and Ateco 869.
STEP 1: Stack your cake layers. Place your bottom cake layer on the plate, cake stand, or board you want to serve the cake on, and then place that on top of your turntable.
Next, use your offset spatula to spread 300g of whipped frosting on top, then sprinkle on 150g of the cake crumbs. If you only made 3 cake layers instead of 4, use 450g of frosting and 225g of crumbs in between each layer. Don't add the crumbs all the way to the edge- leave a 1-inch overhang. Use your fingers to press it into the frosting slightly.
Repeat this process with the remaining cake layers, placing the final layer on upside down so it's extra flat. For the frosting on top of the final layer, simply apply a thin layer- you don't need to use the full 300/450g. You can eyeball it.
STEP 2: Apply a crumb coat. A crumb coat is a thin layer of frosting applied to the top and sides of the cake before the final, thicker coating. It is meant to lock in the crumbs and moisture of the cake and creates an extra stable base.
Start by adding a small dollop of frosting and use your mini offset spatula to spread it around the sides of the cake. Continue adding more frosting as needed until all of the sides are covered. Then, use your bench scraper at a 45-degree angle to smooth it out. It doesn't have to be perfect. Fill in any additional gaps as needed with more frosting using your mini offset spatula.
At this point, a thin layer of frosting should be covering the entire surface area of the cake, but you should still be able to see the cake layers peeking through. Use your turntable to spin the cake around and check if it's even. If any parts of the cake are leaning, gently push them back into place using your spatula or bench scraper.
When your crumb coat is complete, refrigerate the cake for at least 30 minutes (longer is best if possible). This will stabilize your cake layers to prevent any slipping and sliding in the final frosting step.


STEP 3: Frost the sides. Use your icing spatulas and remaining frosting to apply a thicker coating of frosting to the sides of the chilled cake. Don't skimp here- if you don't use enough, it'll be hard to smooth out the cake without digging into the crumb coat, preventing a smooth finish.
Once you've added your frosting, sweep your bench scraper against the side of the cake at a 45-degree angle. Do this lightly or you'll scrape off too much frosting. Fill in any gaps or holes with more frosting as needed.
STEP 4: Decorate. Use leftover frosting to pipe designs like swirls or rosettes as desired. You could also decorate with a white chocolate ganache drip and even use gel food coloring to dye it pink for extra flare. Sprinkles on top are also great!

FAQ
Depending on how it's sliced, an 8-inch cake can yield at least 12 large triangular slices or 16-20 thinner ones. However, if you slice it horizontally (more on that below), you can get even more.
Round cakes are typically cut into triangular slices, but you can maximize the number of servings by cutting horizontally instead. Essentially, you cut the cake across its diameter into several horizontal strips. Then, you flip the cake slabs onto a cutting border and cut each slab into 3 or 4 columns. To visualize this better, read this article on cutting cake! With this method, an 8-inch cake that typically yields 12-16 triangular slices can yield up to 28 horizontal slices!
Technically birthday cake (or funfetti/confetti cake) is just vanilla cake with sprinkles. However, for extra "birthday cake" flavor, you could also add a few teaspoons of cake batter extract (which is essentially a mix of almond extract, butter extract, and vanilla) to the cake batter. This adds that sweet, nostalgic, box mix cake kind of flavor.

Expert Baking Tips
- Read the recipe in full before beginning. There are a lot of ingredients and steps for this cake, so make sure you read before to ensure you have everything you need.
- Go heavy on the frosting and crumbs. It'll look like a lot when you're stacking the cake layers, but once you cut into the cake you'll see it's the perfect amount. Since we're using whipped cream here, it's not overwhelmingly sweet or heavy. Plus, you're gonna want extra crumbs- their crunchiness is the best part!
- Serve at room temperature: Take the cake out of the fridge for at least 1-2 hours before serving. Because the cake layers have butter in them, they taste more soft and moist at room temperature. Think about it- if you serve it straight from the fridge, the butter is gonna harden up, and so will your cake!
Storage and Freezing Instructions
Cover leftover cake slices with plastic wrap and refrigerate for up to 2-3 days or freeze for up to 2-3 months. Thaw leftover cake slices in the refrigerator overnight. Make sure to bring any cold cake to room temperature before serving- because this cake has butter in it, it is less soft and moist when cold because the butter hardens up.
More Cake & Cupcake Recipes You'll Love...


Leave a STAR REVIEW below if you try this recipe! Tag me on Instagram @treatsbytalija and for more ideas, check out the other desserts on my blog!
Print8-Inch Vanilla Birthday Cake

This 8-inch vanilla birthday cake combines 4 moist funfetti cake layers with a Milk Bar-style crunch filling and a creamy whipped frosting. A less sweet frosting and texture from the crunchy cake crumbs elevate classic birthday cake to the next level!
- Prep Time: 90 minutes
- Cook Time: 30 minutes
- Total Time: 4 hours
- Yield: 12-16 slices 1x
- Category: cakes & cupcakes
- Method: baking
- Cuisine: American
Ingredients
For the Cake Layers:
- 525 g granulated sugar
- 420 g bleached cake flour
- 1 teaspoon baking powder
- ¾ teaspoon baking soda
- ¾ teaspoon salt
- 85 g (¾ stick) unsalted butter, softened and cut into thin slices
- 480 g buttermilk, at room temperature
- 270 g vegetable or canola oil
- 3 large eggs and 3 egg whites, at room temperature
- 25 g pure vanilla extract
- 125 g rainbow sprinkles (preferably jimmies)
For the Cake Crumbs:
- 150 g bleached cake flour
- 150 g granulated sugar
- 40 g light brown sugar
- 30 g rainbow sprinkles
- 1 teaspoon baking powder
- Pinch of salt
- 85 g (¾ stick) unsalted butter, melted
For the Whipped Frosting:
- 450 g (2 8-ounce blocks) cream cheese, straight from the fridge
- 260 g powdered sugar, sifted if lumpy
- 2 teaspoons pure vanilla extract
- 960 g (1 quart) heavy cream or heavy whipping cream, straight from the fridge
Instructions
Make the Cake Layers:
- Preheat oven to 350°F (177°C). Line 3 or 4 8-inch (20 cm) round cake pans with parchment paper rounds, then grease the bottom and sides with nonstick spray. Place the cake pans on a large baking sheet, so that when you bake the cakes you can transfer the pans to the oven all at once. Set aside.
- In the bowl of a stand mixer, combine the sugar, cake flour, baking powder, baking soda, and salt. Mix with the paddle attachment on low speed for 30 seconds to combine.
- With the mixer running on low speed, slowly add the chunks of butter to the dry ingredients. Don't do it all at once to prevent splattering. Beat on low speed until the butter breaks down into very fine crumbs, forming a mixture that resembles sand.
- In a large bowl or liquid measuring cup with a spout, whisk the buttermilk, oil, eggs, and vanilla until combined.
- With the mixer running on low speed, very slowly pour the wet mixture into the dry ingredients. Once enough liquid has been incorporated that you can no longer see streaks of flour, increase the speed to medium-low and continue adding the liquid. Stop and scrape the bottom and sides of the bowl as needed. If the batter ever looks lumpy, stop adding liquid and allow the mixer to run for 10-20 seconds to beat out any lumps before adding more. Once all of the liquid has been incorporated, the batter will be thin and smooth.
- Divide the batter between the pans. If you're making 4 cake layers, pour 525g of batter into each pan. If you're making 3 layers, pour 700g of batter.
- Bake for 20-30 minutes, or until a toothpick inserted in the center of the cake comes out clean or with a few moist crumbs.
- Allow the pans to cool for 5 minutes, then carefully invert over a wire rack to release the cakes. While the cakes are cooling, make the crumbs and frosting.
Make the Cake Crumbs:
- Preheat oven to 300°F (149°C). Line a large baking sheet with parchment paper. Set aside.
- In a large bowl, whisk the cake flour, sugar, brown sugar, sprinkles, baking powder, and salt until combined. Pour in the melted butter and mix until there are no more streaks of flour and moist crumbs form. Toward the end of mixing, I find it is easier to use your hands.
- Spread the mixture over the baking sheet, breaking up larger pieces of crumbs into slightly smaller pieces.
- Bake for 11-16 minutes. Every 3 or 4 minutes into baking, rotate the baking sheet and stir the crumbs so that they bake evenly. The crumbs are done baking when they are just slightly dried to the touch. They will harden significantly more as they cool, so they shouldn't be crispy right out of the oven or they will be rock-hard at room temperature.
- Allow the crumbs to cool completely as you make the frosting.
Make the Whipped Frosting:
This makes a large batch of frosting, so I recommend splitting the recipe in half and making it two times so as to not overwhelm your mixer.
- Add the cream cheese, sugar, and vanilla to the bowl of a stand mixer. Whip using the whisk attachment for 3-4 minutes or until light and fluffy. Scrape the bottom and sides of the bowl as needed.
- With the mixer running on medium-low speed, slowly pour in the cream. Once the mixture starts to thicken, increase to high speed and continue pouring in the cream. Keep whipping until the mixture is stiff.
Assemble & Decorate:
- Place your bottom cake layer on the plate, cake stand, or board you want to serve the cake on. Then, place that on top of your turnable.
- Use a mini offset spatula to spread 300g of the whipped frosting on top, then sprinkle on 150g of the cake crumbs. If you made 3 cake layers instead of 4, use 450g of frosting and 225g of the crumbs in between each layer. Leave a 1-inch overhang for the crumbs along the edges, and use your fingers to gently press them into the frosting.
- Repeat with the remaining cake layers, placing the final layer on upside down so it's extra flat. Apply a thin layer of frosting on top of the cake. It doesn't have to be the full 300/450g- you can eyeball it.
- Apply a crumb coat to the cake by very lightly frosting the sides. Start by adding a small dollop of frosting to the side of the cake and use a mini offset spatula to spread it around. Continue adding more frosting as needed until all of the sides are covered. Use a bench scraper at a 45-degree angle to smooth it out. Fill any additional gaps as needed with more frosting.
- Refrigerate the cake for a minimum of 30 minutes. The longer you refrigerate it, the more stable it will be for decorating in the next step.
- Use an icing spatula to apply a thicker coating of the remaining frosting to the top and sides of the cake. It will be hard to smooth out the cake without digging into the crumb coat if you don't use enough, so don't skimp. Once you've added your frosting, sweep a bench scraper against the side of the cake at 45-degree angle to smooth it out. Do this lightly or you'll scrape off too much frosting. Fill gaps or holes with more frosting as needed.
- Decorate the cake as desired. Use leftover frosting to pipe on the tops or sides and top with sprinkles.
- Refrigerate the cake if you're not going to serve it right away. Let it sit out at room temperature for at least 1-2 hours before enjoying for the ideal texture- it's much more soft and moist!
Notes
- Quickly bring ingredients to room temp: Microwave the buttermilk in 10-second increments. Place the eggs in a bowl with warm water for 10-20 minutes. Cut the butter into thin slices.
- The buttermilk in the cake layers can be substituted with full-fat sour cream or plain greek yogurt if necessary.
- This recipe can also make 36 cupcakes. Line your cupcake pans with paper liners and bake for 16-20 minutes or until a toothpick comes out clean. Use this tutorial to fill the cupcakes with the cake crumbs, then frost with the whipped cream as desired. I recommend halving the amount of whipped cream if you make cupcakes instead- layer cakes need more frosting in order to frost the sides while cupcakes don't.
- Instead of whipped cream, you could also frost the cake with Swiss meringue buttercream, cream cheese frosting, or American buttercream.
Nutrition
- Serving Size: 1 slice
- Calories: 831
- Sugar: 69.3 g
- Sodium: 325.6 mg
- Fat: 49.6 g
- Carbohydrates: 99.6 g
- Protein: 9.2 g
- Cholesterol: 134.9 mg
Keywords: 8-inch birthday cake, 8-inch vanilla cake, confetti birthday cake


Leave a Reply